- Minecraft Pigs Guide - April 11, 2022
- Minecraft Sheep Guide - March 11, 2022
- How to Make Stonecutter Recipe - October 30, 2021
In Minecraft, there are a few essential tools that every player should have. There are tools such as the crafting table, furnace, blaster, anvil, and more. The list goes on. One tool, however, may not be in the constant limelight but is still one of the greatest tools added into the game (at least in Survival mode). That tool is the stonecutter.
Added in 1.14 in Java Edition, it lets players save their blocks while doing construction work. While its usage is limited to stone blocks and their varieties, it still is a wonderful tool. Yet, not many players think of getting one of these in their playthrough. Stone has lots of varieties, including mossy cobblestone, sandstone, granite, diorite, and so much more. Having a tool such as a stonecutter to customize these is efficient.
If you are building a tower made of sandstone, a statue made of prismarine bricks, or a monument made of quartz, then the stonecutter is the effective tool that you should have. This guide will show you why the stonecutter is one of the most important tools you might need, especially if you are cost-effective when constructing stone builds.
How to Make the Stonecutter in Minecraft
Version needed to obtain a stonecutter:
- Version 1.14 or above
Requirements to make a stonecutter:
- At least a stone pickaxe
- Crafting table
- Furnace
- Fuel (e.g., coal, charcoal, bucket of lava)
- Iron ingot
- Three stones
Generally, you only need one stonecutter unless you have multiple homes that you regularly stay in from time to time, in which multiple stonecutters might be beneficial. Still, a single stonecutter is good enough as you can break it when you plan on going to another location just like crafting tables or furnaces. In this guide, you are to follow some general instructions from another article. When you open it, there are hints on where you can start depending on what you already have.
General Instructions
Making a stonecutter from scratch deals with making a crafting table, a furnace, a pickaxe, and more. These essential details have already been covered in previous guides, so to make your experience easier, follow the instructions in this guide but only up to step 5.
https://minemum.com/how-to-make-shears-in-minecraft/
This guide contains the following steps:
- Step 1: Make a crafting table
- Step 2: Make a wooden pickaxe
- Step 3: Make a stone pickaxe
- Step 4: Make a furnace and get coal
- Step 5: Get iron ingots (NOTE: you only need one iron ingot to make a stonecutter)
Again, do NOT proceed to step 6 as it involves making shears. Otherwise, do all of these steps so that you can have your iron ingot. There is one key difference, however, between the guide and making a stonecutter. As mentioned before, you only need one iron ingot, whereas, in the guide provided, you are instructed to gather two. Since you are making a stonecutter, one iron ingot will do.
It is highly encouraged that you read the other article as it is more detailed and is full of hints for each step on where to find the resources needed. Still, if you are not able to visit the link due to time limitations and the like, here is a quick summary of each step.
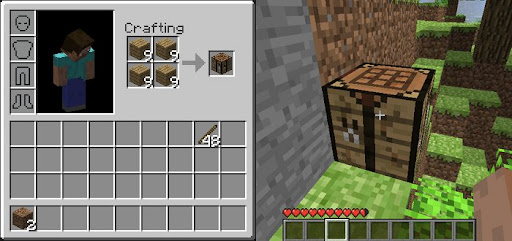
Step 1: Make a Crafting Table
Requirements: four planks (any variety)
What to do:
- Find a tree with at least three logs.
- Gather at least three logs (use your fists if you do not have an ax).
- Find the 2×2 crafting grid in your inventory.
- Place one log in the grid.
- Drag the stack of four planks from the output slot into your inventory.
- Fill the grid with the planks individually.
- Drag the crafting table from the output slot into your inventory.
Step 2: Make a Wooden Pickaxe

Requirements: three wooden planks; two sticks
What to do:
- Open your crafting table.
- Place the stack of two logs in the 3×3 crafting grid.
- Drag the stack of eight planks from the output slot into your inventory.
- Place two planks vertically anywhere in the 3×3 crafting grid.
- Drag the stack of four sticks from the output slot into your inventory.
- Take two sticks and place one stick on the centermost tile and the other on the tile below it.
- Take three planks and place them individually at the top row.
- Drag the wooden pickaxe from the output slot into your inventory.
Step 3: Make a Stone Pickaxe
Requirements: three cobblestones; two sticks
What to do:
- Find stones and mine them using your wooden pickaxe (you need at least 11 stones; three for the stone pickaxe and eight for the furnace). Note that when mining stones, you will receive cobblestones.
- Open your crafting table.
- Do the same procedure in “Step 2: Make a wooden pickaxe”, but instead of planks, replace them with cobblestones. You do not have to follow steps 2 to 5 that are within the section if you already have two sticks remaining.
- Drag the stone pickaxe from the output slot into your inventory.
Step 4: Make a Furnace and Get Coal
Requirements: eight cobblestones
What to do:
- Open your crafting table.
- Fill the 3×3 crafting grid EXCEPT for the centermost tile with cobblestones.
- Drag the furnace from the output slot into your inventory.
- Find at least two coal ores (one for iron smelting and one for stone smelting) and mine them using your stone pickaxe. Note that when mining coal ores, you will receive coal.
- Gather the coal.
Step 5: Get Iron Ingots
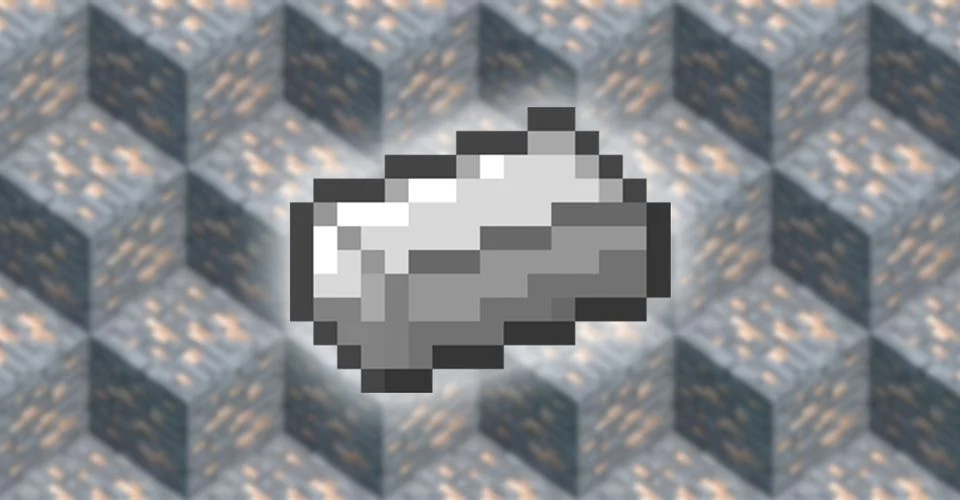
Requirements: One raw iron
What to do:
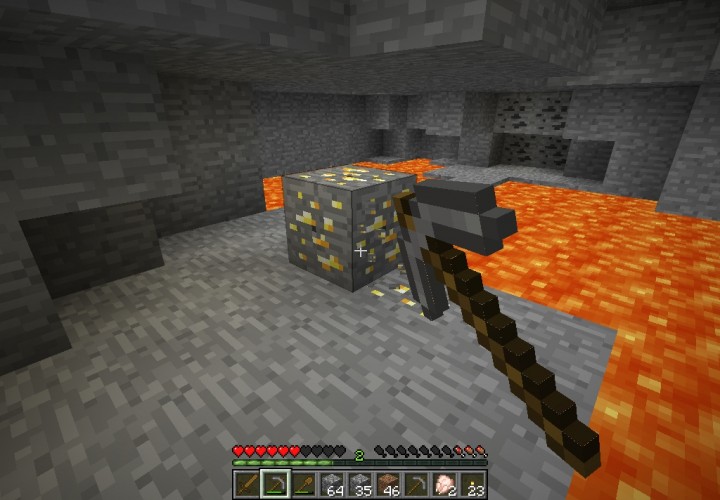
- Find at least one iron ore and mine it using your stone pickaxe (do not use your wooden pickaxe to mine iron ore because you will get nothing when doing it). Note that when mining iron ores, you will receive raw iron.
- Gather the raw iron.
- Open your furnace.
- Put the raw iron in the upper slot of the furnace’s interface.
- Put the fuel (e.g., coal) in the lower slot of the furnace’s interface.
- Wait for the raw iron as it is smelted into an iron ingot.
- Gather the iron ingot.
Once you have done all of these, you are almost there to complete your stonecutter. All you need now is stone. If so, follow the next steps.
Step 1: Mine Three Stones
Stone is needed to make a stonecutter. As you have already known, when you mine stone, you will receive cobblestone. Cobblestones cannot be used to make stonecutters. So, how do we convert that cobblestone into stone? This guide will teach you how. First, you need to find at least three stones that you can mine. You can go to where you collected the stones for your furnace to collect more. Stone is an extremely common resource since it can be found beneath the dirt.
Reminder: stone can be mined using at least a wooden pickaxe. Assuming you have followed all the steps beforehand, you probably have a stone pickaxe by now, and that is much more efficient. If you do not have a pickaxe, you should make one to mine stone. If you mine stone without a pickaxe, it will take longer and, in the end, you will get nothing in return.
Alternative: Use a Pickaxe Enchanted with Silk Touch
Alternatively, if you are already well-equipped with the appropriate tools, you can mine stone using a pickaxe enchanted with Silk Touch. If you have one, you can mine stone without it turning into cobblestone; it will simply give you stone. When this is done, you do not have to smelt cobblestone to turn it into stone. Thus, you can skip the next step and proceed to step 3.
Step 2: Smelt the Cobblestones Into Stones
Once you have mined at least three stones for your stonecutter and received three cobblestones, it is time to convert them back into stone. To do so, follow these steps:
- Open your furnace.
- Place the stack of cobblestones in the upper slot of the furnace’s interface.
- Place the fuel (e.g., coal) in the lower slot of the furnace’s interface.
- Wait for the cobblestones as they are smelted into stones.
- Gather the stones.
Congratulations! You now have the stones you need to make the stonecutter.
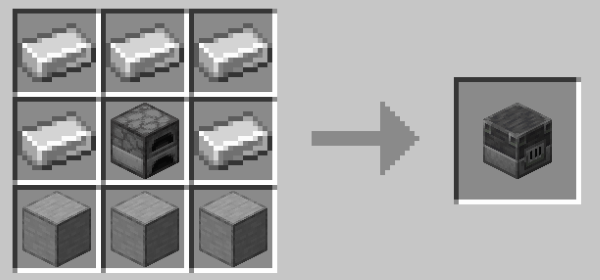
Step 3: Craft the Stonecutter
When you have successfully followed all these steps, it is time to craft your stonecutter. To make a stonecutter, you need the following materials:
- One iron ingot
- Three stones
Since you already have these materials based on the previous steps, you now need to do the following:
- Open your crafting table.
- Place one iron ingot on the centermost tile of the 3×3 crafting grid.
- Place all three stones individually on the bottom row of the 3×3 crafting grid.
- Drag the stonecutter from the output slot into your inventory.
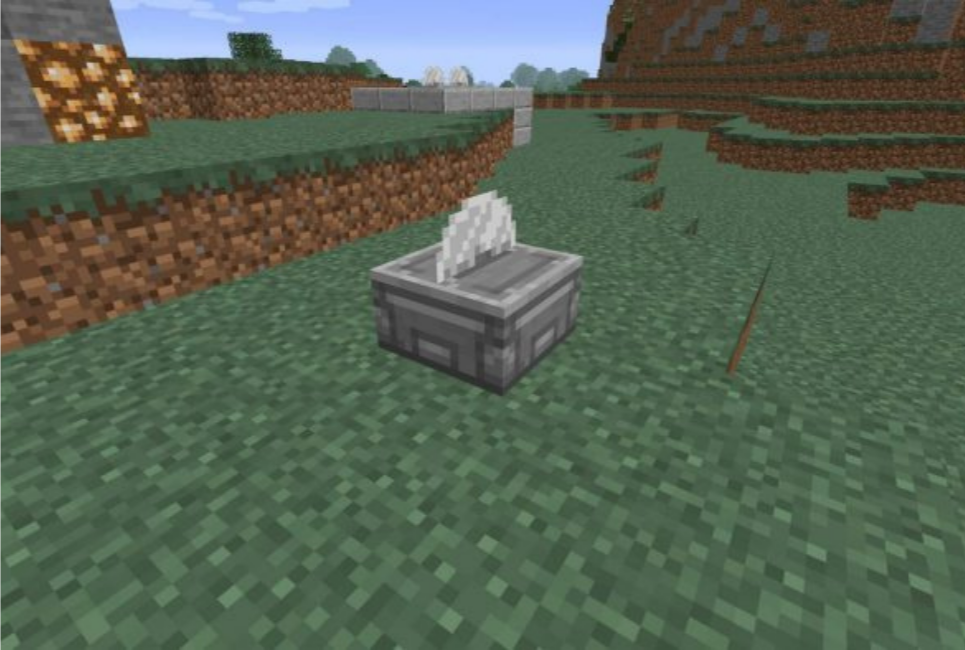
You now have your stonecutter! You can place it anywhere you like and open it just like how you would open a crafting table. If you feel like moving your stonecutter elsewhere, you can also mine it using a pickaxe. Note that if you break a stonecutter without using a pickaxe, it will drop nothing. Thus, a pickaxe is required. Before delving into the details on how to use the stonecutter, the details on how to get a stonecutter through other methods need to be discussed first.
How to Get a Stonecutter Through Other Methods in Minecraft
Other than crafting, there is only one other way to get a stonecutter. Stonecutters can generate within villages, specifically inside stone mason houses. Depending on the village’s biome, stonemasons have different appearances and cannot be simplified into a common distinguishable trait. Their houses also differ in appearance depending on the village’s biome. If you find a village, the way to find a stone mason’s house would be to search each house for a stonecutter.
How to Use the Stonecutter in Minecraft
The stonecutter’s main role is to transform stones and their variants into their other counterparts, such as stairs, slabs, etc. So, you can transform a stone brick into stone brick stairs. You can transform a sandstone into a sandstone wall. When you place the stonecutter and open it just like how you would open a crafting table, its interface will pop up; this is the stonecutter’s graphical user interface or the stonecutter’s interface for short. The interface features three major components:
- The input slot to the left
- The selection panel at the middle
- The output slot to the right
To use the stonecutter, you only need to do the following:
- Place a block in the input slot.
- Select the desired outcome from the selection panel.
- Drag the outcome from the output tile into your inventory.
Of course, only certain blocks can work in the stonecutter. Here is a list of blocks that the stonecutter can work with, along with the possible outcomes for each.
- Stone
- Stone Stairs
- Stone Bricks
- Stone Slab (x2)
- Stone Brick Stairs
- Chiseled Stone Bricks
- Stone Brick Slab (x2)
- Stone Brick Wall
- Smooth Stone
- Smooth Stone Slab (x2)
- Stone Bricks
- Stone Brick Stairs
- Chiseled Stone Bricks
- Stone Brick Slab (x2)
- Stone Brick Wall
- Mossy Stone Bricks
- Mossy Stone Brick Stairs
- Mossy Stone Brick Slab (x2)
- Mossy Stone Brick Wall
- Granite
- Granite Stairs
- Granite Slab (x2)
- Granite Wall
- Polished Granite
- Polished Granite Stairs
- Polished Granite Slab (x2)
- Polished Granite
- Polished Granite Stairs
- Polished Granite Slab (x2)
- Diorite
- Diorite Stairs
- Diorite Slab (x2)
- Diorite Wall
- Polished Diorite
- Polished Diorite Stairs
- Polished Diorite Slab (x2)
- Polished Diorite
- Polished Diorite Stairs
- Polished Diorite Slab (x2)
- Andesite
- Andesite Stairs
- Andesite Slab (x2)
- Andesite Wall
- Polished Andesite
- Polished Andesite Stairs
- Polished Andesite Slab (x2)
- Polished Andesite
- Polished Andesite Stairs
- Polished Andesite Slab (x2)
- Cobblestone
- Cobblestone Stairs
- Cobblestone Slab (x2)
- Cobblestone Wall
- Mossy Cobblestone
- Mossy Cobblestone Stairs
- Mossy Cobblestone Slab (x2)
- Mossy Cobblestone Wall
- Sandstone
- Sandstone Stairs
- Sandstone Slab (x2)
- Sandstone Wall
- Cut Sandstone
- Cut Sandstone Slab (x2)
- Chiseled Sandstone
- Cut Sandstone
- Cut Sandstone Slab (x2)
- Smooth Sandstone
- Smooth Sandstone Stairs
- Smooth Sandstone Slab (x2)
- Red Sandstone
- Red Sandstone Stairs
- Red Sandstone Slab (x2)
- Red Sandstone Wall
- Cut Red Sandstone
- Cut Red Sandstone Slab (x2)
- Chiseled Red Sandstone
- Cut Red Sandstone
- Cut Red Sandstone Slab (x2)
- Smooth Red Sandstone
- Smooth Red Sandstone Stairs
- Smooth Red Sandstone Slab (x2)
- Prismarine
- Prismarine Stairs
- Prismarine Slab (x2)
- Prismarine Wall
- Prismarine Bricks
- Prismarine Brick Stairs
- Prismarine Brick Slab (x2)
- Dark Prismarine
- Dark Prismarine Stairs
- Dark Prismarine Slab (x2)
- Block of Quartz
- Quartz Stairs
- Quartz Slab (x2)
- Chiseled Quartz Block
- Quartz Pillar
- Quartz Bricks
- Smooth Quartz
- Smooth Quartz Stairs
- Smooth Quartz Slab (x2)
- Purpur Block
- Purpur Block Stairs
- Purpur Block Slab (x2)
- Purpur Pillar
- Bricks
- Brick Stairs
- Brick Slab (x2)
- Brick Wall
- Nether Bricks
- Nether Brick Stairs
- Nether Brick Slab (x2)
- Nether Brick Wall
- Chiseled Nether Bricks
- Red Nether Bricks
- Red Nether Brick Stairs
- Red Nether Brick Slab (x2)
- Red Nether Brick Wall
- Basalt
- Polished Basalt
- End Stone
- End Stone Brick Stairs
- End Stone Brick Slab (x2)
- End Stone Brick Wall
- End Stone Bricks
- End Stone Bricks
- End Stone Brick Stairs
- End Stone Brick Slab (x2)
- End Stone Brick Wall
- Blackstone
- Polished Blackstone
- Polished Blackstone Bricks
- Chiseled Polished Blackstone
- Blackstone Slab (x2)
- Polished Blackstone Slab (x2)
- Polished Blackstone Brick Slab (x2)
- Blackstone Stairs
- Polished Blackstone Stairs
- Polished Blackstone Brick Stairs
- Blackstone Wall
- Polished Blackstone Wall
- Polished Blackstone Brick Wall
- Polished Blackstone
- Polished Blackstone Bricks
- Chiseled Polished Blackstone
- Polished Blackstone Slab (x2)
- Polished Blackstone Brick Slab (x2)
- Polished Blackstone Stairs
- Polished Blackstone Brick Stairs
- Polished Blackstone Wall
- Polished Blackstone Brick Wall
- Block of Copper
- Cut Copper
- Waxed Copper
- Cut Waxed Copper
Other uses
When a stonecutter is placed under a note block, the note block will instead produce a “bass drum” sound. This can be useful if you are planning on recreating a song with note blocks involving bass drums. The stonecutter can also be used as a villager’s job site block to turn its profession into a stonemason. Stonemasons are villagers that will trade with you stone-related items.
Frequently Asked Questions about the Stonecutter
Question: What Does Stonecutter do in Minecraft?
Answer: The stonecutter can transform most stone blocks and their variants, such as Prismarine, Blackstone, etc., into its other forms. For example, a stonecutter can transform a cobblestone block into a cobblestone wall. It can transform a sandstone block into sandstone stairs. In this guide, you can find a full list of blocks that can be worked by the stonecutter along with their possible outcomes.
Question: Why should you use a stonecutter in Minecraft?
Answer: Stonecutters can be efficient in terms of saving time and resources. For example, you can use a stonecutter to transform stones into chiseled stone bricks instantly. Without a stonecutter, you would have to craft stone into stone bricks, craft the stone bricks into stone brick slabs, then finally craft the stone brick slabs into chiseled stone bricks. Another example would be that the stonecutter can transform a single cobblestone block into a single block of cobblestone stairs. Without the stonecutter, you would have to use six cobblestone blocks to craft four blocks of cobblestone stairs.
Question: When was the Stonecutter Removed from Minecraft?
Answer: The stonecutter was never removed from Minecraft. This useful tool was introduced in 1.14 and is still present in the latest version. Before 1.14, the stonecutter did not exist, so you cannot craft nor find one.
Question: When was the Stonecutter Added to Minecraft?
Answer: The stonecutter was added in Java Edition version 1.14, also known as the Village and Pillage Update. At first, the stonecutter could only be obtained in Creative Mode and had no functionality whatsoever. Slowly, the developers added in functionality as well as turned it into the stone mason’s job site block.
Question: Do Stonecutters Exist in Bedrock Edition?
Answer: Yes, stonecutters exist in Bedrock Edition. They can be crafted similarly to Java Edition and can also be found in villages inside stone mason houses. They offer the same functionality as Java Edition’s stonecutters.
Conclusion
Now you know how to make a stonecutter recipe. Make sure to check out some of our other articles as well.
For more interesting readings check out: